This week, Linux Out Loud chats about the Steam Deck and Valve’s Linux gaming foray.
Welcome to episode 12 of Linux Out Loud. We fired up our mics, connected those headphones as we searched the community for themes to expound upon. We kept the banter friendly, the conversation somewhat on topic, and had fun doing it.
00:00 Introduction
01:29 Contact Battle
11:34 3D Printer Upgrades
15:57 Matt’s Listener Feedback
21:23 Steam Deck in Hand
43:36 DIY PSU
48:11 3D Printer Ordered
50:05 Game of the Week
53:33 Close
54:21 Post Show
Nate
- OctoPrint + Glass Print Bed
- Xantrex Powerhub 1800
Wendy
Matt
- Listener Feedback
- Game of the Week
Upcoming Events
- Game Shpere 24 hour Charity Livestream
- Monday, June 20, 2022 through Tuesday, June 21, 2022
- Starts 9:00 AM EDT / 1:00 PM UTC
- Charity
Contact info
Matt (Twitter @MattGameSphere)
Wendy (Mastodon @WendyDLN)
Nate (Website CubicleNate.com)
1 Like
Re: 3d Printer stuff
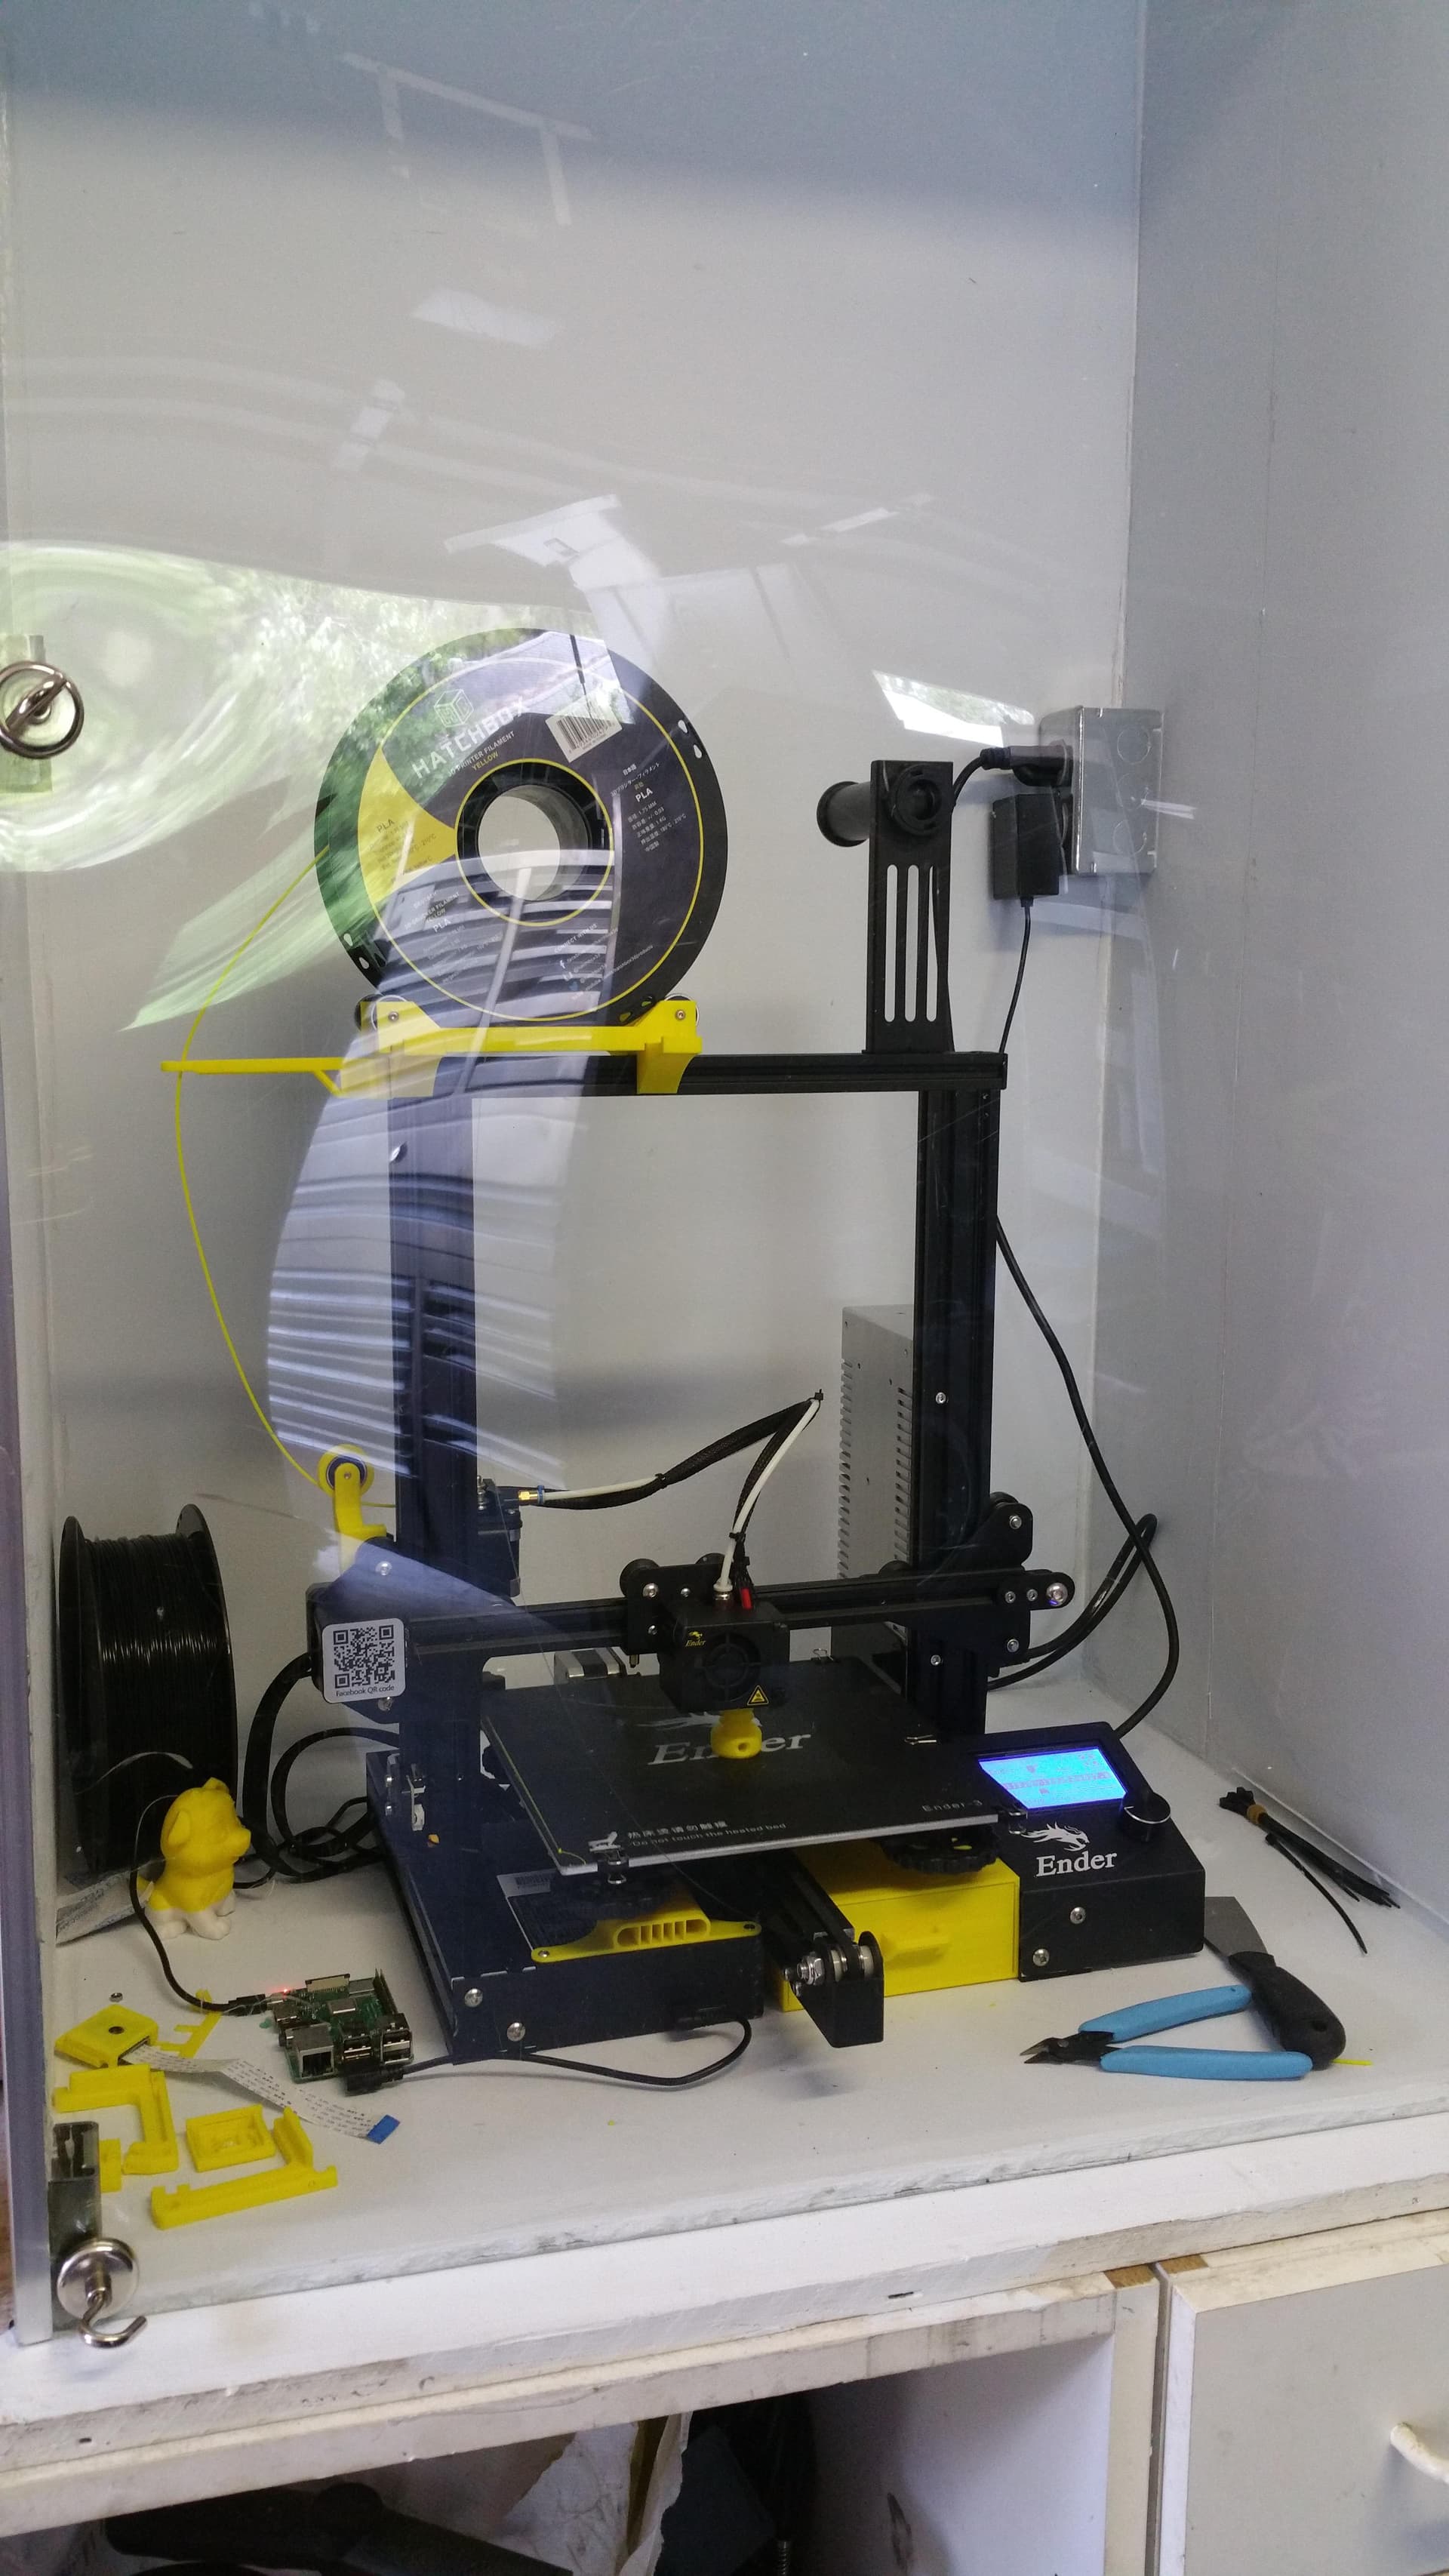
Here are a couple of photos of my enclosure for my Ender 3. I used concrete backer board. (Vibration free, nearly sound proof and definitely fire proof.) Hopefully this link works and you can look at process.
https://imgur.com/gallery/g9d919u
Here is the result:
Musings about this setup:
-
I used Plexiglas as a door by gluing short pieces of metal (superstrut) to the inside of the enclosure and then held the Plexiglas in place with magnets. I later printed holders for the magnets and glued the holders to the Plexiglas. The “door” just pops right off and “jumps” back into place.
-
I received some heat from the commentators on reddit (surprise, surprise) for leaving the electronics inside the case. I print ABS exclusively. I was told that the heat would kill my machine. The print bed runs at 110 C and nozzle at 238 C in a non-air-conditioned garage in South Florida. It’s HOT inside the enclosure. Well it’s been running 8-10 hours most days for over 3 years – and I have not had any premature failures. That includes the Rpi that is running Octoprint.
-
Learn the settings in Cura (or your slicer of choice) and get familiar with the settings known as “magic numbers” for your particular stepper motor step size and thread pitch on the z axis.

-
I used the stock bed for a while but after 100s of prints, it was a mess. I moved to a borosilicate glass bed with a PEI sheet on top of it and never looked back. It is practically fool proof.
-
speaking of the bed – upgrade the springs and you will almost never have to level your bed. I can’t remember the last time I had to level the bed – but I make sure not to get in an arm wrestling match with the bed when removing printed pieces.
-
Don’t print every thing in the middle of the bed. In Cura I will push the piece to different locations on the bed and then I often rotate the glass bed 90 degrees at the start of a new print. That ensures that there is somewhat uniform and even wear on all parts of the machine as well as the PEI sheet.
3 Likes
Very nice set up 
I’m always amazed by the quantity of knowledge / details you need to do this the right way
1 Like
True. I didn’t know what I didn’t know when I got started. It’s a lot but is doable. Early adopters help pave the way for plug and play machines coming in the future.
I walked my great-nephew (14 yrs) through his purchase and set up of his Ender. He gets a little frustrated at times over the fine tuning and details. I remind him that if it worked seamlessly out of the box, the only thing he would know is where the on/off button is located. But this way, he gains intricate knowledge of how this process works and problem solving skills that can be used throughout his life.
1 Like
I see it that way too, I studied industrial design way back then.
At first I was intrigued by 3D printing and then started to inquire. When I realised the learning curve I was still interested but not now. I definitely don’t have the time for that now so it’s become a later down the road thing. In the meantime I collect tidbits of knowledge 
1 Like
So many awesome tips! From what I’m gathering, the enclosure doesn’t have to be perfect, as long as it doe the job. I was thinking about doing a couple of upgrades. I’ll get the springs as par to that.