KdenLive is an excellent video editor but there is one major drawback to the software: rendering speed. Unfortunately the program does not yet support GPU acceleration for exporting videos. A ten minute, 1080p video can take anywhere from 45 minutes to several hours to export. Needless to say, this not ideal.
In order to mitigate this issue there is a way to improve rendering times using other open source software. It is a little bit of a hack but this procedure will cut rendering/exporting times by over half.
Pres-Requisites
- A computer with an Nvidia graphics card and the most current drivers installed
-It has not been discovered if this procedure works on AMD GPU’s
- KdenLive installed. (
***PLEASE NOTE: AppImage users will have to follow these steps every time the program is laucnhed.
Prodecure
-
Go to Shotcut - Download and download the 64-bit portable tar file to your Downloads folder.
-
Create a new folder in your Home directory. Name it whatever you desire. For this procedure it will be call ‘APPS’ (~/APPS)
-
Export the shotcut tar.gz file that is in your Downloads folder. You will see a ‘Shotcut’ folder in Downloads. (~/Downloads/Shotcut)
-
Inside the Shotcut folder is another folder named ‘Shotcut.app’. Move that folder to the APPS folder created in step 2 (sudo mv ~/Download/Shotcut/Shotcut.app ~/APPS).
-
Open KdenLive
-
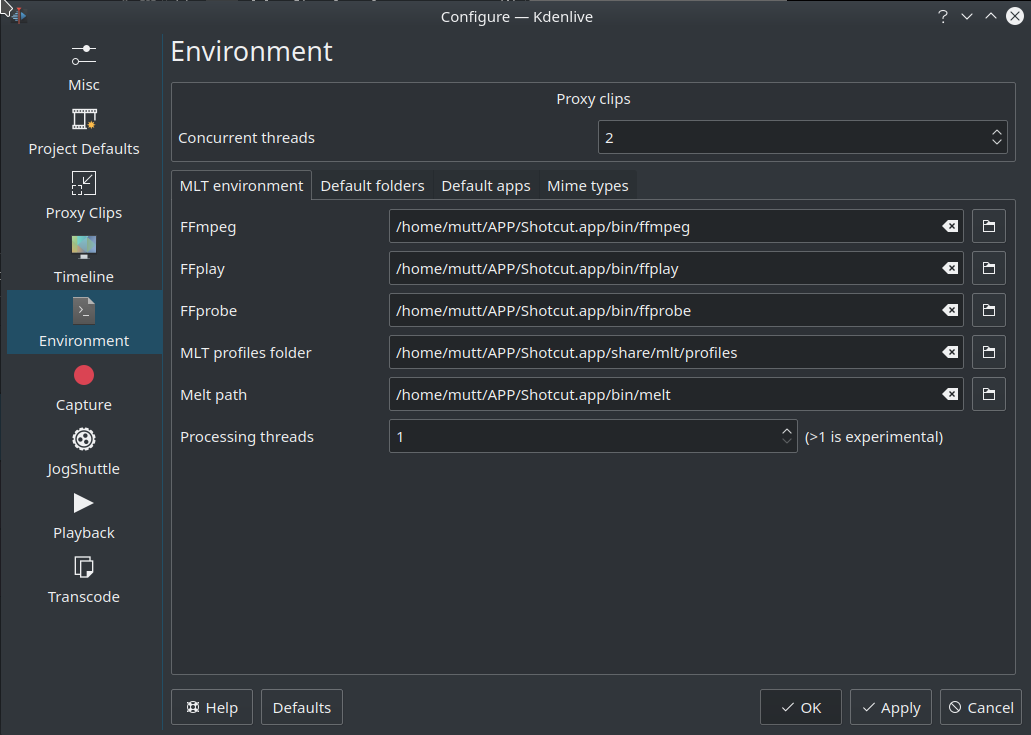
Navigate to Settings → Configure KdenLive → Environment
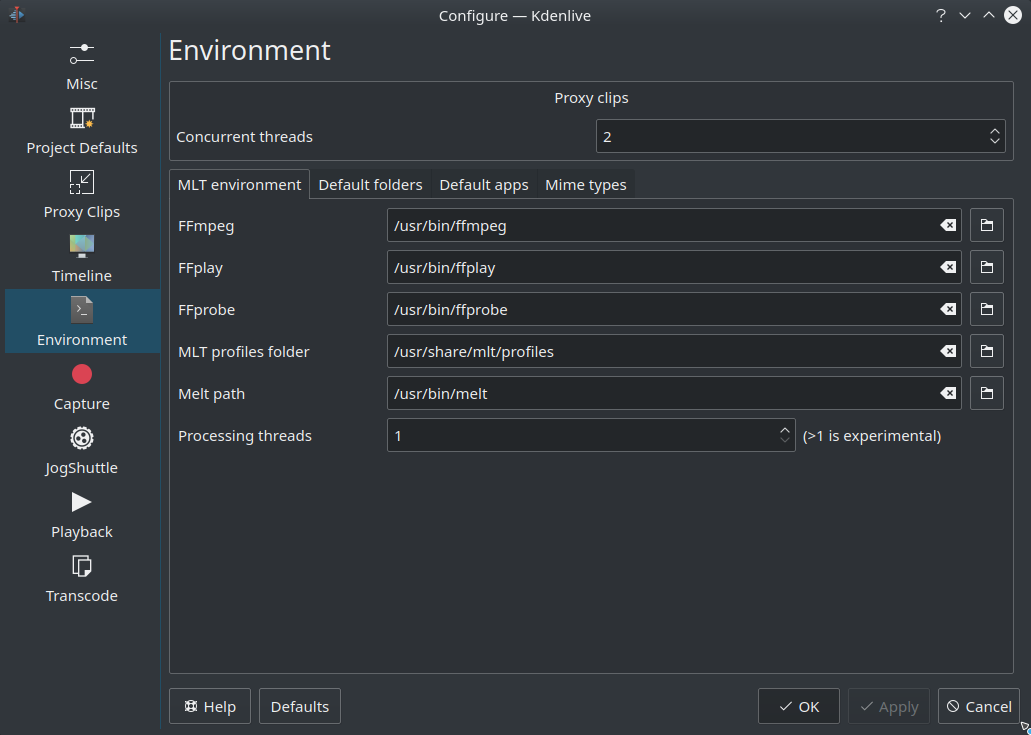
- Once in the Environment screen, all the Ffmpeg values will need to point to the Shotcut.app folder. So you will need to replace the values with the path to the new ffmpeg locations. Once the values are set be sure to click ‘Apply’ then ‘OK’. See the below picture as an example
Ex.
OLD PATH => (/usr/bin/ffmpeg)
NEW PATH => (/home//APPS/Shotcut.app/ffmpeg)
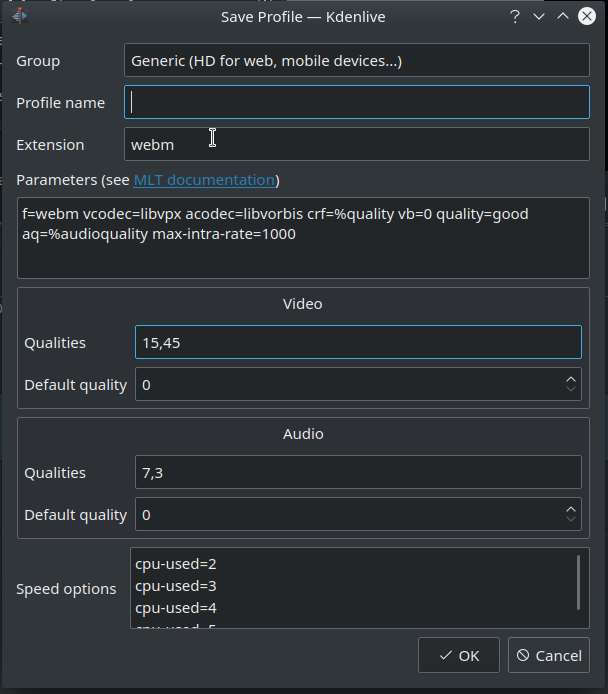
- Now that the Environment values have been setup a Render profile needs to be built. Click on Render in the top tool bar and choose ‘Render’ (or hit CTRL + RETURN on your keyboard). The popup will look like this.
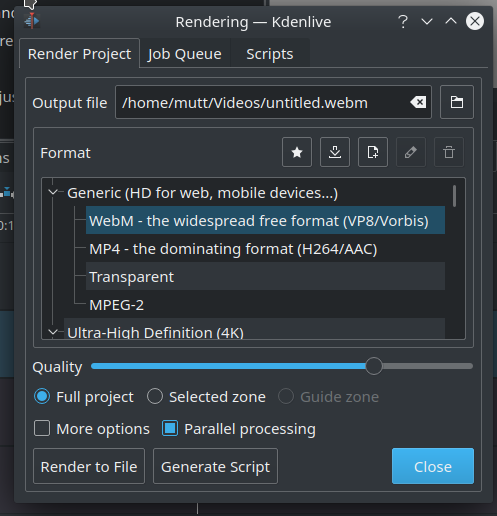
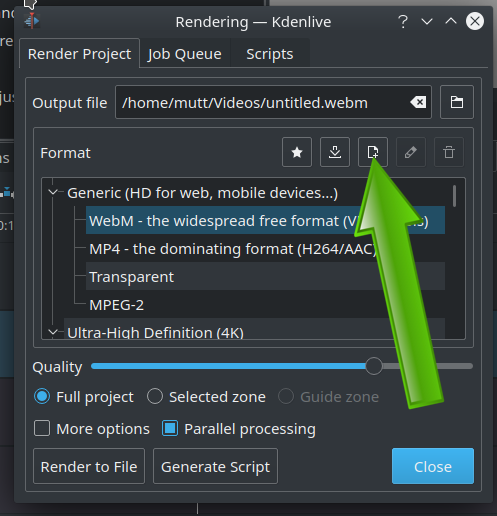
- Click on the icon for ‘Create New Profile’
- In the profile window you will need to make changes to the following fields. Once complete, click OK:
Profile Name: What every you want. For this example we chose ‘nvidia’
Extension: mp4
Paramaters: f=mp4 vcodec=nvenc_h264 acodec=aac g=120 global_quality=21 ab=384k vq=21 r=60 preset=slow bf=2
Speed Options: Delete everything here an leave it blank
And that’s it. This setup has been tested on multiple machines and works like a dream. But due to not have an AMD GPU that part could not be tested (maybe Ryan can give this a whirl and let us know).
Happy Editing!