Here is what I’ve found on a beautiful website by Enoch Tsang which sadly appears to have recently disappeared but I found it on web.archive.org and will include the text here after I show my steps:
-
I made sure I wasn’t running wayland as all I found applied to xorg:
$ env | grep -i wayland [this returned nothing]
-
I used xrandr to list my monitors:
$ xrandr --listmonitors
Monitors: 2
0: +*DisplayPort-2 3840/597x2160/336+0+0 DisplayPort-2
1: +HDMI-A-0 3360/518x2100/324+3840+480 HDMI-A-0
-
After playing with my settings for each monitor like this: (for example)
$ xrandr --output DisplayPort-2 --scale .601x.601
or
xrandr --output DisplayPort-2 --scale .75x.75
or
-
I created a bash script called .xsession (hidden file by virtue of the “.”) with nano and saved it my user directory:
nano .xsession
#!/usr/bin/env bash
#xrandr --output DisplayPort-2 --scale 1.5x1.5
xrandr --output HDMI-A-0 --scale 1.75x1.75
(notice that the first entry is commented out, as I set the 4k monitor using the displays setting program in plasma)
- Made the script executable permissions:
$ chmod +x ~/.xsession
And now I can execute the file by simply typing:
./.xsession
When I run this, the 1080p monitor changes resolution and is completely usable, but the wallpaper doesn’t scale. If I can figure that out, then I’ll need to learn to make the script execute upon login.
So that is as far as I’ve gotten along this path. As this is my first contribution trying to help, any guidance or suggestions would be valuable. Thank you.
Here is the article:
http://web.archive.org/web/20210109154430/https://enochtsang.com/articles/scaling-two-monitors-differently-on-linux-mint
Scaling Two Monitors Differently on Linux Mint
Written by Enoch Tsang on October 15th, 2017
As a programmer, a 4K monitor provides a lot more real estate to work with and is just very aesthetically pleasing. As a gamer, a high refresh monitor looks and feels phenomenal. Being both, I decided to buy one of each monitor, but setting up both on Linux Mint proved to be a little finicky.
This is because 4K monitors usually need to be scaled up otherwise everything is too small, but high refresh monitors don’t need to be scaled since they only have resolutions up to 1080p (at the time of writing). Searching online only gave me partial solutions to scale both monitors differently for my particular setup. I would like to provide a complete solution for scaling two monitors differently on Linux Mint.
Setup
Here are all the relevant components for my particular setup.
| Linux Distribution |
Linux Mint 18.2 Cinnamon 64-bit Sonya |
| GPU |
NVIDIA GeForce GTX 1080 |
| CPU |
AMD - Ryzen 5 1600 3.2GHz 6-Core Processor |
| High Refresh Monitor |
Acer GN246HL (1920x1080 144Hz) |
| 4K Monitor |
LG 27MU67 (3840x2160 @ 60Hz) |
The distribution is important because different Linux distributions use different display managers. Also it seemed even among different versions of Linux Mint Cinnamon, there were varying solutions. The GPU is important only because it uses an NVIDIA driver, the NVIDIA X Server Settings tool that comes with it is very handy. I’ve listed the CPU to note that the AMD Ryzen, unlike an Intel processor, doesn’t have any integrated graphics. To note, the two monitors I’ve listed are physically side by side for this setup.
Linux Mint High DPI Support Limitations
Starting in Mint 17 Qiana, HiDPI support was introduced into Linux Mint. In Mint 18.2 Sonya, the built in support was only limited to choosing between having the User Interface Scaling to be double (for Hi-DPI), normal, or auto (which would pick one of the two).

There are two serious limitations for this case.
- Both monitors get scaled, so everything in the 1080p monitor looks gargantuan.
- You can’t choose to scale at any factor other than 2.
Setting the Scale with xrandr
Luckily Linux comes with a very handy command line tool called xrandr , it is the swiss army knife for display management. The first step is just figuring out the current display naming and settings, that’s done by just running xrandr --listmonitors .
enoch@enoch-pc ~ $ xrandr --listmonitors Monitors: 2 0: +*DVI-D-0 1920/531x1080/298+0+0 DVI-D-0 1: +DP-2 3840/600x2160/340+1920+0 DP-2
From this, we know that the name of the high refresh monitor is DVI-D-0 because of the resolution, and the 4K monitor is DP-2 .
Using that, here are the xrandr commands I used to scale the displays.
xrandr --output DVI-D-0 --scale 2x2.001 --mode 1920x1080 --rate 144.00 xrandr --output DP-2 --scale 1.5x1.5
Let’s break down the two commands.
-
--output DVI-D-0 describes which display we are altering, in this case DVI-D-0 is the high refresh monitor, we know that from the previous section.
-
--scale 2x2.001 scales the high refresh monitor so that everything is twice as small; coupled with the HiDPI scaling from Mint, everything would be the right size. The 2.001 is a weird workaround, without that the whole screen turned black for whatever reason.
-
--mode 1920x1080 --rate 144.00 is to set the refresh rate at 144Hz, it defaults to 60Hz without this section. Setting the mode is also necessary, the refresh rate changes don’t apply without the mode being set also.
-
--output DP-2 --scale 1.5x1.5 scales the 4K monitor, the end result is that everything is scaled up by a factor of about 1.33. This is because the end result for scaling is a combination of the User Interface Scaling as well as the screen scale. The User Interface Scaling scales up by a factor of 2, and the 1.5x1.5 scales down by a factor of 1.5. The calculation is 2/1.5, making a total scale of 1.33. You’ll want to tweak this number to what suits you.
Here’s what my desktop looked like originally. 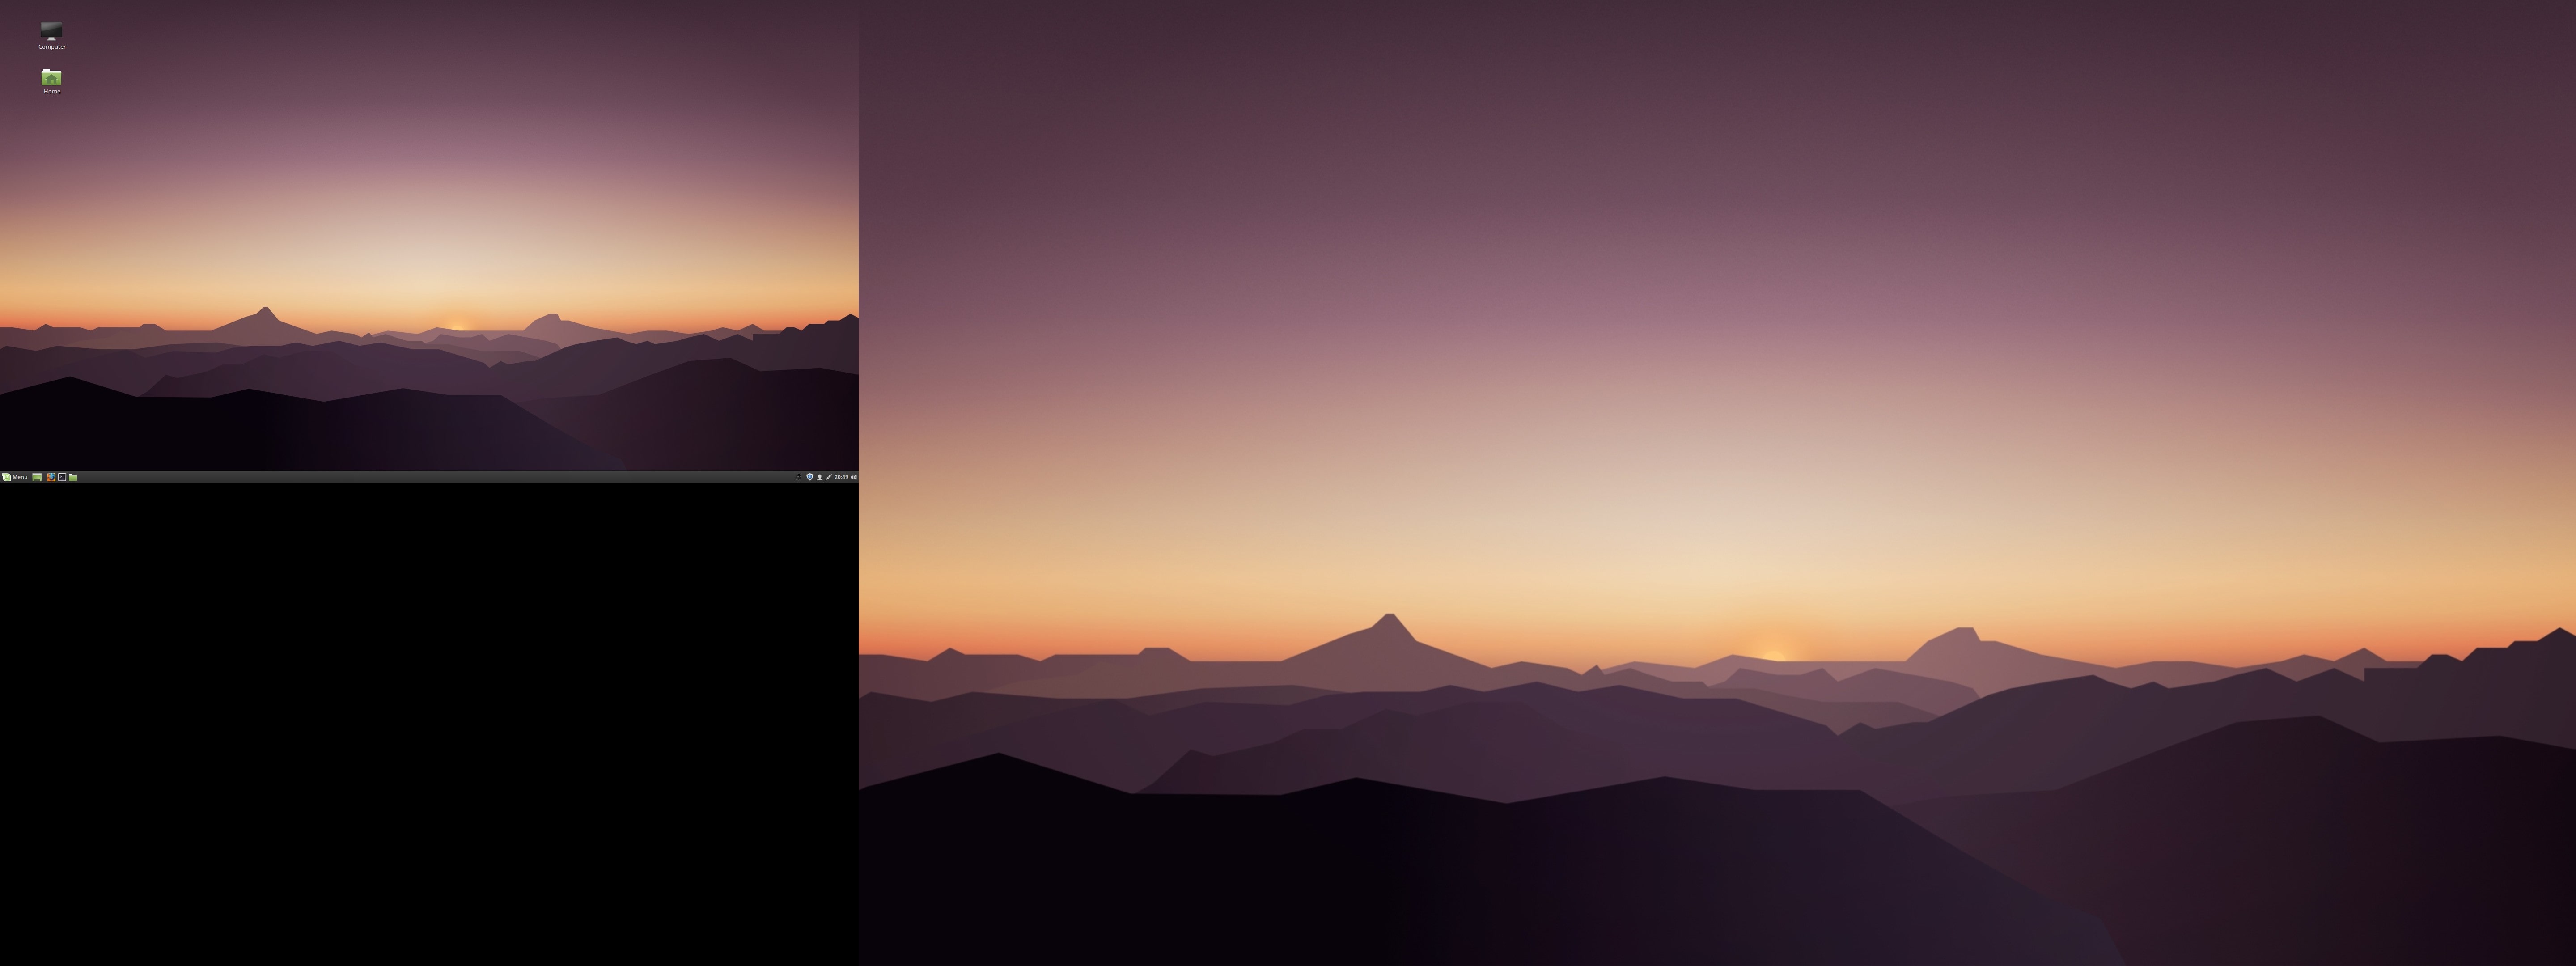
This is what it looked like after the xrandr command and turning on the HiDPI User Interface scaling. That setting can be found in System Settings → General → Desktop Scaling . 
The result was that the scaling for the two monitors looked great, but the placement of the two monitors were overlapping.
Monitor Placement with NVIDIA X Server Settings
The NVIDIAs X Server Settings tool was a great help to see what’s actually going on with the displays.

It is actually possible to get the positioning of the screens correct with just xrandr , but it’s actually more complicated than it looks due to the the --scale option messing with the size of the framebuffer and the conceived size of the monitors. In my opinion, it’s much simpler to just drag the screens to where you want through NVIDIA X Server Settings .

It’s almost right, but there’s two caveats.
- The new display placements are not persistent after a shutdown.
-
NVIDIA X Server Settings doesn’t sync up with the desktop environment properly, causing the desktop background to be way out of whack.

To overcome both of those limitations, all that’s needed is to hit the Apply button in Linux Mint’s Display settings, nothing else. This is because NVIDIA X Server Settings doesn’t properly interface with the display manager. Applying the settings fixes the desktop background, and saves the display placements.

Persistent xrandr
The last step, is making the xrandr changes persistent. I did this using a startup application. I made a script at ~/.xsession with the contents being the xrandr commands I used.
~/.xsession
#!/usr/bin/env bash xrandr --output DVI-D-0 --scale 2x2.001 --mode 1920x1080 --rate 144.00 xrandr --output DP-2 --scale 1.5x1.5
Changed it to executable permissions.
chmod +x ~/.xsession
Then added it to the Startup Applications .

Conclusion
And with that, my system would boot up with custom scaled displays. I hope this article was helpful to you. if you have any questions, comments, or concerns, I would love to hear from you!