Terminal Takeaway πŸ₯‘

community@dlnforum:~$ uname

β•”β•¦β•—β”Œβ”€β”β”¬β”€β”β”Œβ”¬β”β”¬β”Œβ”β”Œβ”Œβ”€β”β”¬   β•”β•¦β•—β”Œβ”€β”β”¬β”Œβ”€β”Œβ”€β”β”Œβ”€β”β”¬ β”¬β”Œβ”€β”β”¬ ┬
 β•‘ β”œβ”€ β”œβ”¬β”˜β”‚β”‚β”‚β”‚β”‚β”‚β”‚β”œβ”€β”€β”‚    β•‘ β”œβ”€β”€β”œβ”΄β”β”œβ”€ β”œβ”€β”€β”‚β”‚β”‚β”œβ”€β”€β””β”¬β”˜
 β•© β””β”€β”˜β”΄β””β”€β”΄ β”΄β”΄β”˜β””β”˜β”΄ β”΄β”΄β”€β”˜  β•© β”΄ β”΄β”΄ β”΄β””β”€β”˜β”΄ β”΄β””β”΄β”˜β”΄ β”΄ β”΄ 

# Make your own text art
xdg-open 'https://patorjk.com/software/taag/#p=display&h=0&f=Calvin%20S&t=Terminal%0ATakeaway'

Rule 0: Break the rules.
Rule 1: If the terminal was a breakfast cereal, which fun scripts/tips would be on the back?
Rule 2: Ask questions.
Rule 4: No one should need to tesseract your screenshot.
Rule 8: Read one thing and read it well.
Rule 32: echo 'enoemos esirprus' | rev
Rule 64: Show people their mistakes so they can improve.
Rule ∞: Some things can’t be done in terminal.
declare -A arr[∞]=16; printf "Rule ${arr[∞]}: The last rule is false.\n"

Useful markup:

> Comment block

Comment block


`echo β€œBasic code block”`

echo "Basic code block"


```
#!/usr/bin/env sh
printf β€œCode block with coloration”
```

#!/usr/bin/env sh
printf "Code block with coloration"

2 Likes

Something I learned recently…

0 can be used as a shorthand for localhost.

Examples:
ping 0
curl 0 # Outputs self-hosted site among other things.
ssh -L 5900:0:5900 USER@ADDR # Local forwarding of VNC port over SSH

3 Likes

I knew that I could reach the local host in three different ways:

  1. localhost
  2. 127.0.0.1
  3. 0.0.0.0

Thanks for the shortcut. Now I have a fourth.

BTW the shortcut 0:some_port works in a browser that doesn’t have β€œsearch from the address bar” (omnibox) enabled.

2 Likes

Is this where to post the sexiest terminal? The hot red LED’s of the β€œ6802 Serial Terminal” are a contender…

4 Likes

Getting your public IP in terminal:

Using curl

curl ifconfig.me
curl ifconfig.co
curl icanhazip.com
curl ipecho.net/plain
curl bot.whatismyipaddress.com
curl https://diagnostic.opendns.com/myip
curl http://checkip.amazonaws.com
curl http://whatismyip.akamai.com
curl icanhazip.com
curl https://ipinfo.io/ip
curl -s https://checkip.dyndns.org | sed -e β€˜s/.Current IP Address: //’ -e 's/<.$//’

Using the lynx terminal Web browser

lynx -dump ifconfig.me | grep β€˜IP Address’

Using wget

wget -q -O - ifconfig.me
# -q for quiet
# -O - to output to terminal

Using DNS lookup through host

host myip.opendns.com resolver1.opendns.com | grep β€œAddress:” | awk β€˜{print $2}’
(Seems to only return X-forwarded so it can be innacurate)

Getting your IP’s geolocation:

curl ipinfo.io
curl ipinfo.io/`wget -q -O - ifconfig.me`
curl http://api.geoiplookup.net/?query=\`wget -q -O - ifconfig.me`
curl https://freegeoip.app/xml/\`wget -q -O - ifconfig.me`
curl https://freegeoip.app/csv/\`wget -q -O - ifconfig.me`
curl https://freegeoip.app/json/\`wget -q -O - ifconfig.me`

6 Likes

beautiful. These will go into my β€œcommands file.” That’s a file I keep of cli commands that I don’t need to know every day – but need them from time to time. It’s just a text file that has the command with a short description. Then occasionally at times when I waiting for something to start, I will just read through the file and keep those commands refreshed. Thanks for the new content.

1 Like

I have one of those too. :slight_smile:

1 Like

NGINX script for making your own public IP API in the cloud like the ones above:

location /ip {
    default_type text/plain;
    return 200 $remote_addr;
}
location /ip_json {
    default_type application/json;
    return 200 "{\"ip\":\"$remote_addr\"}";
}

From scratch:

# Fedora/CentOS/RHEL:
sudo dnf install nginx -y
sudo nano /etc/nginx/nginx.conf
# Debian/Ubuntu:
sudo apt install nginx -y
sudo nano /etc/nginx/sites-available/default
# Paste inside the "server {" encapsulation:
	location /ip {
		default_type text/plain;
		return 200 $remote_addr;
	}
	location /ip_json {
		default_type application/json;
		return 200 "{\"ip\":\"$remote_addr\"}";
	}
# Save and exit

sudo systemctl start nginx
curl 0/ip # Test
curl 0/ip_json # Test
sudo systemctl reload nginx # If you need to apply changes

# From your local machine:
curl MY_SERVER_IP_HERE/ip # Test

# Please ask for finer grained instructions.
2 Likes

Unlike this post, that’s value added.

1 Like

Cross-post :wink:

It’s Wednesday but I’ve been using the terminal a lot recently to edit mp3 files! I have been using mp3cut to trim up the DLN file system talks from previous episodes. I find this is quicker than using audacity!
It is really nice to have a tool like this and clear documentation that provides example use cases. +1 As you can see from my history, I had to play a bit to get the hang of it :stuck_out_tongue:

  127  mp3cut -o media.mp3 -t 01:00:40-01:02:44 190.mp3
  128  mp3cut -o media.mp3 -t 01:00:59-01:02:44 190.mp3
  129  mp3cut -o media.mp3 -t 01:01:10-01:02:44 190.mp3
  130  mp3cut -o media.mp3 -t 01:01:21-01:02:44 190.mp3
  131  mp3cut -o media.mp3 -t 01:01:21-01:02:46 190.mp3
  132  mp3cut -o opt.mp3 -t 47:36-51:08 191.mp3
  133  mp3cut -o opt.mp3 -t 47:48-51:08 191.mp3
  134  mp3cut -o opt.mp3 -t 47:47+500-51:08 191.mp3
  135  mp3cut -o opt.mp3 -t 47:46+500-51:08 191.mp3
  136  mp3cut -o proc.mp3 -t 01:09:48-01:08:50 192.mp3
  137  mp3cut -o proc.mp3 -t 01:09:48-01:11:50 192.mp3
  138  mp3cut -o proc.mp3 -t 01:10:10-01:11:50 192.mp3
  139  mp3cut -o proc.mp3 -t 01:10:13-01:11:50 192.mp3
  140  mp3cut -o proc.mp3 -t 01:10:13+500-01:11:50 192.mp3
  141  mp3cut -o proc.mp3 -t 01:10:13+400-01:11:50 192.mp3
  142  mp3cut -o proc.mp3 -t 01:10:13+900-01:11:50 192.mp3
  143  mp3cut -o proc.mp3 -t 01:10:13+900-01:11:30 192.mp3
  144  mp3cut -o proc.mp3 -t 01:10:13+900-01:11:46 192.mp3
  145  mp3cut -o proc.mp3 -t 01:10:13+900-01:11:47 192.mp3
  146  mp3cut -o proc.mp3 -t 01:10:13+900-01:11:50+800 192.mp3
  147  mp3cut -o proc.mp3 -t 01:10:13+900-01:11:44+800 192.mp3
  148  mp3cut -o proc.mp3 -t 01:10:13+900-01:11:43 192.mp3
  149  mp3cut -o proc.mp3 -t 01:10:13+900-01:11:43+800 192.mp3
3 Likes

Check out EDEX-UI:

2 Likes

Rendering images in terminal.

sudo dnf install chafa # Fedora/CentOS/RHEL
sudo apt install chafa # Debian/Ubuntu

chafa IMAGE_FILE

Terminal font size set at: 2pt

Terminal font size set at: 12pt

Virtual console:

Awoooooooo…
image

2 Likes

chafa animated GIF example:

chafa https://media.giphy.com/media/f63ra8KYIvWGA/giphy.gif

1

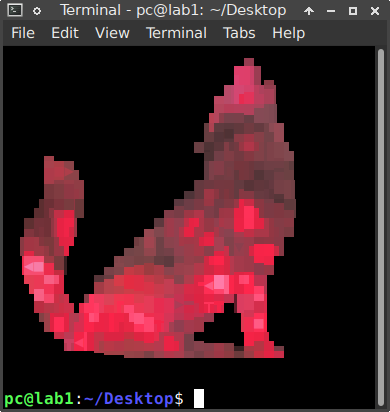
Similar to the next one, this is a GIF of a GIF so expect smoother results.


Cooked up some chafa sprite animation instructions:

# Sprites source: https://www.gameart2d.com/free-dino-sprites.html

wget https://www.gameart2d.com/uploads/3/0/9/1/30917885/freedinosprite.zip
unzip freedinosprite.zip
cd ./png
nano run.sh
# Paste the following:

#!/bin/bash
i=1
while true; do
	chafa --clear -size 50 "Walk ($((i++))).png"
	if [ $i = 11 ]; then i=1; fi
	sleep 0.05
done

# Save
chmod +x ./run.sh
./run.sh
# Hold down Ctrl+C to stop

Peek 2020-12-22 00-35

8 Likes

Tip of the week: Notice my bad practice above --^

Train yourself to use chmod u+x instead of chmod +x

chmod +x grants executable rights system wide, chmod u+x just grants rights to the file’s owner which is usually all you want.

Try it yourself:

# Create files named A, B and C in the current directory
touch ./A ./B ./C

# Observe the initial file rights
ls -la ./A ./B ./C

# Give everyone executable access to A (same as chmod a+x)
chmod +x ./A

# Give just the owner executable access to B
chmod u+x ./B

# Give just the owner and group executable access to C
chmod ug+x ./C

# Observe the new rights
ls -la ./A ./B ./C

# Cleanup
rm ./A ./B ./C

Security Bonus:

Don’t give executable rights to files at all and just run them directly. Examples:
bash ./MY_FILE
sh ./MY_FILE

5 Likes

Add these to your bashrc and thank me later

#Shell Options
shopt -s autocd # change to named directory
shopt -s cdspell # autocorrects cd misspellings
shopt -s cmdhist # save multi-line commands in history as single line
shopt -s dotglob
shopt -s histappend # do not overwrite history
shopt -s expand_aliases # expand aliases
shopt -s checkwinsize # checks term size when bash regains control
bind "set completion-ignore-case on"

# Custom Alias

# easy resource
alias resource="source ~/.bashrc"


# Easy Open
alias open="xdg-open"

# IP colors
alias ip='ip -br -c'

alias tb='nc termbin.com 9999'
alias termbin=tb


3 Likes

ip has colors and a tabular mode… whhhhattttttt

.bashrc lsusers()

Credit to terminalforlife, arguably THE most underrated terminal focused show on YouTube.

Lots of .bashrc goodies here:

BashConfig/source/.bash_functions at master Β· terminalforlife/BashConfig Β· GitHub

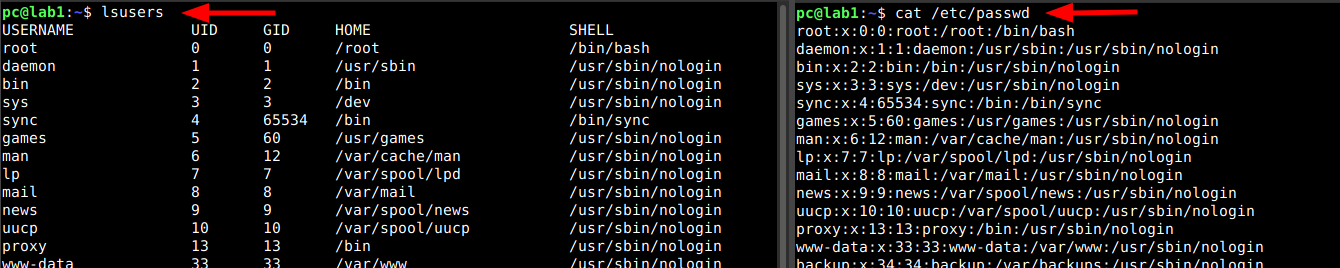
Highlighting a really nice one, this’ll list all the users on the system (from /etc/passwd) in a human readable table.

nano ~/.bashrc
# Paste the following somewhere within:
# lsusers() Repo: https://github.com/terminalforlife/BashConfig/blob/master/source/.bash_functions
# lsusers() License: https://github.com/terminalforlife/BashConfig/blob/master/LICENSE
lsusers(){ #: List users on the system, according to '/etc/passwd'.
	printf "%-20s %-7s %-7s %-25s %s\n" "USERNAME" "UID" "GID" "HOME" "SHELL"

	local X
	while IFS=':' read -a X; do
		if [ "$1" == "--nosys" ]; then
			# It's possible some users might show up if they mistakenly
			# were given a HOME, but '--nosys' should otherwise work.
			if [[ ${X[5]/\/home\/syslog} == /home/* ]]; then
				printf "%-20s %-7d %-7d %-25s %s\n"\
					"${X[0]}" "${X[2]}" "${X[3]}"\
					"${X[5]}" "${X[6]}"
			fi
		else
			printf "%-20s %-7d %-7d %-25s %s\n" "${X[0]}"\
				"${X[2]}" "${X[3]}" "${X[5]}" "${X[6]}"
		fi
	done < /etc/passwd
}

Compare:

1 Like

Exitting VIM

A 2017 study including over 1,000,000 developers found jQuery devs were the most likely to get stuck in VIM:

Know your way out!

  • Pressing Escape won’t allow you to β€œescape” VIM but it will get you back to Normal mode.
  • From Normal mode you can enter Command mode by pressing :
  • Now you can enter a command to exit VIM, then press enter (to exit).

Examples:

  • :q #Quit
  • :q! #Rage quit (quit and discard changes)
  • :wq #Save and quit
  • :x #Also Save and quit
  • :qa #Quit all open files
  • :qa! #Rage quit all open files

Exit directly from Normal mode:

  • Esc + Shift ZZ #Save and quit
  • Esc + Shift ZQ #Rage quit

Remote recovery: (if all else fails)

  • SSH into the machine and run: pkill vim
2 Likes

:w !sudo tee %

I always need to save when I forget to sudo.

3 Likes