Thanks for staying with me on this!
This only finds
-r-------- 1 root root 128T Apr 21 19:00 /proc/kcore
Thanks for staying with me on this!
This only finds
-r-------- 1 root root 128T Apr 21 19:00 /proc/kcore
reduce the “+5G” to “+1G” and then go to “+500M”
BTW, ICYW the 128 Terabytes on kcore is just reporting what the absolute limit of allocation is on 64-bit systems.
using +1G, it find several things it should (movie files), plus the /proc/kcore and a new file called /swap.img but it’s 4.0G, so still not the issue.
How big is your media collection? Perhaps it is being counted twice: 1) once as a real file set and 2) as a virtual file set in overlay2.
That’s what’s happening for sure, because they are the same size exactly. It’s a little less than 200GB. I’m not understanding the overlay piece I think.
Here is what might be happening, seeing that you have /media as the location of your collection, jellyfin might be configured to mount the overlay folder in the same spot.
Is your video collection really stored under /media? What happens if you move your collection to something like: ~/my_media_collection. Then start docker as you did before but modify the media assignment to:
sudo docker run -d -v /srv/jellyfin/config:/config -v /srv/jellyfin/cache:/cache -v ~/my_media_collection:/media --net=host jellyfin/jellyfin:latest
Yes, that has to be what’s happening. I followed the instructions from here for the Stable Docker. So I made /media and ran the commands as they have.
I can’t really move anything, Ubuntu thinks I’m out of space. But let’s imagine I prune some files and then mv some to the new location. What will you command be having me do? Just the same thing, but seeing if it changes the overlay2 size?
Yes. The command will essentially be the same thing but it should get your media out of the folder that is designated by the operation system for mounting auxiliary file systems.
You don’t have to move anything to try the command – but you might have to move the media to get the command to work (if that makes sense – what I’m saying is that it might be possible that it might work without moving the media. Then you can move the media later.)
IMHO, those are terrible instructions for running jellyfin in docker. If I were doing this, I would create a folder under your home folder called jellyfin. Inside the jellyfin folder I would create a folder called jf_cache and a folder called jf_config and a folder called my_media_collection. Then I would modify the docker command as follows:
sudo docker run -d -v /home/snorlax/jellyfin/jf_config:/config -v /home/snorlax/jellyfin/jf_cache:/cache -v /home/snorlax/jellyfin/my_media_collection:/media --net=host jellyfin/jellyfin:latest
The command that is given on your link is not meant to be copied verbatum. But is an example of how to do it and you should me mapping your chosen directory structure to the jellyfin container. Often you will see something like “/path/to/your/config” giving you the hint that this is an arbitrary designation to be completed by the user.
What is that doing differently, though? I can see it’s running configs from inside of my user instead of /srv/, but the command for /media is basically the same between the 2. I’ll try it tomorrow when I have time to move files around.
I hope this explanation is beneficial. I don’t mean to be pedantic – it’s just that I’m that guy when someone says “I’m thirsty,” I tend to open the fire hydrant.
A Docker container is an isolated package that includes everything needed to run an application: code, specific environment, system tools, system libraries and settings. The key here is isolation.
Essentially everything that is needed to run the application is “contained” in the package. This enables the package, in this case jellyfin, to run independently of the operating environment. A user of a docker container doesn’t have to fuss about having every variable right and every dependency tweaked. Everything that is need to run is inside the container.
Another key benefit of isolation is that installing a docker image doesn’t tweak your settings in various esoteric locations on your machine that might in turn have an adverse affect on your other installed programs.
How then do we bridge this isolated container with your local system? Answer: At the start of the container, we make certain declarations, passed as variables, which allow the container to interact with our system. One of those declarations is the “-v” or “–volume” flag which, at runtime, creates a volume and mounts a file system needed for the container.
The “-v” flag either has 2 or 3 fields which are separated by a colon :
The first first field is the location on your local machine where you want the container to have access for a particular purpose. The second field matches your local declaration to the “pre-programmed” location inside the container. I’m skipping the third field for now but it has to to with “reading and writing privileges” and is generally not needed.
You should create these “mount points” under your home directory so that they are saved when you backup your home directory. Additionally, if you create “mount points” above your home directory you are messing with a part of the file system that you, as a local user, don’t own. Most of that area is supposed to be own by “root.” Look at the results of this command (every folder is owned by “root”):
ls -l /So, here is what the command does: it starts the container in a detached mode; declares and mounts 3 volumes for the container to use; directs the container to use the host network namespace; and creates the container from a specific image.
sudo docker run -d -v /home/snorlax/jellyfin/jf_config:/config -v /home/snorlax/jellyfin/jf_cache:/cache -v /home/snorlax/jellyfin/my_media_collection:/media --net=host jellyfin/jellyfin:latest
-d runs the container as detached from the terminal. Stops display interaction
-v /path/to/your/config/:/config creates a volume and mounts it for the container to act as a bridge between your file system and the container. Places the config files in a location where you can back them up for future recover.
-v /path/to/your/cache/:/cache creates a volume and mounts it for the container to use a cache place.
-v /path/to/your/video_collection/:/media creates a volume and mounts it for the container to find your media collection. NOTE: “/media” inside the container is not the same as “/media” in your file system. “/media” in your file system is owned by root not you.
Note: There is an exception to using /media if you have your video collection mounted on an external drive. But I won’t go into that now as I don’t think that is your current configuration.
--net=host tells docker to let the container share the network namespace of the host
jellyfin/jellyfin:last tells docker to create this container from this particular image
Let me know how you get along.
I haven’t found your answers to be pedantic at ll; context (and starting at step 1) are all important, so thanks again.
OK, I stopped my running container, then started a new one using the command you had given. I checked running containers and only had the new one running, and the new one could only see 1 TV episode that I copied to ~/my_media_collection from /media. But, it still sees everything in /media but nothing is playing.
I may just torch the whole thing because really all I’ve done is 1 rsync command to restore everything and then the jellyfin docker commands from their site (well, that and assign a static IP but that’s simple enough).
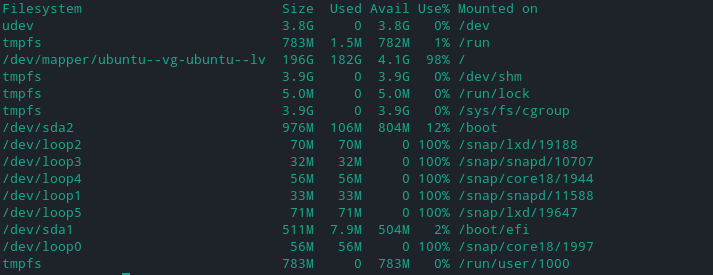
Interestingly, with Docker stopped, / is still full and there is no overlay2
Maybe I made a partioning error at the beginning? I told it to use the whole disk, so everything there was really autocreated.
Great idea about the one show in the new location. Try all of these steps before you nuke the install.
find out what containers are running
docker ps -aStop the container(s)
docker stop [CONTAINER ID]Check to make sure all containers are stopped
docker ps -aStart deleting all containers by the CONTAINER IDs
docker rm [CONTAINER ID]Find all the images on the system
docker image lsdocker imagesRemove the images
docker rmi [IMAGE ID]Clean up the system with
docker system pruneNow that it’s all gone, do a disk usage check:
du -hThen run the docker command one more time:
sudo docker run -d -v /home/snorlax/jellyfin/jf\_config:/config -v /home/snorlax/jellyfin/jf\_cache:/cache -v /home/snorlax/jellyfin/my\_media\_collection:/media --net=host jellyfin/jellyfin:latest
Well, either way I’m not sure that solves the problem. That recent screenshot doesn’t have overlay2 but Ubuntu think my root directory is full in any case.
I went ahead and torched it. The only thing I did differently was on the initial setup of the server to set it to not be part of an LVM group. I just unchecked that box and told it to use the whole disk.
I also did other reading and overlay2 is supposed to mirror whatever filesystem it can read. So I guess my initial server setup the first time messed up the partitions on there and I didn’t check that, I assumed it was caused by overlay2. Thanks for all your help!
It sounds like you know Docker much better than me as well. I created a new image that is running. I want to stop it, so I can setup nginx so I can get to jellyfin.server.lan instead of 192.16.1.104:8096. What’s the correct method of stopping that Docker, then restarting it again?
EDIT: this is resolved now! Thank you for your help, I re-read your instructions and understand better what I did initially to cause my errors (multiple dockers) and now just have one image that I can start and stop. I have nginx reconfigured to work for me, so we’re in business!
You seem like a Docker guru. I’ve never updated Docker before (I just let my last one run forever) but I’d be interested in keeping this one up to date. Is that hard to do? I’m doubly hesitant based on how hard this was to get working the first time.
Get a list of the Docker Containers running:
If the container is running, stop it:
Observe the image info for the Docker images with:
Get the new docker image with:
go to the container’s folder and run the docker-compose file:
Thanks, these are great instructions! What is the difference between an image and a container? I’m realy afraid of breaking the whole setup.
My understanding of the difference is that a Docker image is an immutable (unchangeable), read-only application base that is published by the programmer. Generally, in order for the image to be customized to your particular use, the image needs a read-write “layer” added to it. This read-write layer allows you to specify such items as where files are located; what network to use; what ports to use, etc. The container is a customized, read-write instance of the image modified for your local use.
I understand your hesitation as everyone wants their IT stuff just to work – flawlessly and continually. There is very little risk in running the above commands. And on the flip side of the coin, there is a great surge of exhilaration when you watch that image being pulled and the container runs without a hitch. If something does break, it’s fixable and that’s when you gain experience and knowledge and become the “guru.”